
This is a BlinkM:
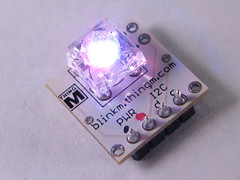
BlinkMs are “smart LEDs”, a type of smart interface component. A BlinkM consists of an ultrabirght RGB LED backed with a microcontroller with built-in knowledge about 24-bit color spaces, color fading, and color pattern generation. All in a package 0.6” wide. You talk to it over I2C, a serial protocol spoken by many different things. (Arduino speaks it, as do Basic Stamps, and your PC) And you can have over 100 BlinkMs on the same serial bus, each individually addressable. Here’s how they can hook up to an Arduino:

BlinkMs are available from SparkFun (US) and Little Bird Electronics (AU). It’s hard to show in just static pictures how fun and easy it is to play with BlinkMs, so here’s a few quick video guides.
Video Quick Start Guide
A video version of the BlinkM Quick Start Guide.
Playing with BlinkMTester
A demonstration of one of the example Arduino sketches “BlinkMTester”, which lets you exercise a BlinkM by typing simple commands to the Arduino.
Exampe Code
There are a couple of examples of how to talk to BlinkMs all zipped up in BlinkM_Examples.zip. You can also peruse them unzipped if you like. The examples are predominately for Arduino currently, but any I2C master will work. Some of the examples so far:
- BlinkMCommunicator
A simple serial-to-i2c gateway for PC controlling of BlinkM (for instance via Processing or the BlinkM Sequencer) - BlinkMTester
A general tool to play with a single BlinkM - BlinkMMulti
An example showing how to communicate with multiple BlinkMs - BlinkMScriptWriter
A demonstration of how to write BlinkM light scripts with Arduino - BlinkMChuck
Control the hue & brightness of a BlinkM with a Wii Nunchuck
More examples will be added periodically.
For the Arduino examples, a convenience library called BlinkM_funcs.h has been created. Just drop this .h file into your sketch folder and call the functions to start playing with BlinkM.
The complete list of functions is below, though you’ll probably only use a few of them for a particular project.
BlinkM_begin();
BlinkM_beginWithPowerPins(byte pwrpin, byte gndpin);
BlinkM_beginWithPower();
BlinkM_sendCmd(byte addr, byte* cmd, int cmdlen);
BlinkM_setAddress(byte newaddress);

BlinkM_setFadeSpeed(byte addr, byte fadespeed);
BlinkM_setTimeAdj(byte addr, byte timeadj);

BlinkM_fadeToRGB(byte addr, byte red, byte grn, byte blu);
BlinkM_fadeToHSB(byte addr, byte hue, byte saturation, byte brightness);
BlinkM_setRGB(byte addr, byte red, byte grn, byte blu);

BlinkM_fadeToRandomRGB(byte addr, byte rrnd, byte grnd, byte brnd);
BlinkM_fadeToRandomHSB(byte addr, byte hrnd, byte srnd, byte brnd);

BlinkM_getRGBColor(byte addr, byte* r, byte* g, byte* b);

BlinkM_playScript(byte addr, byte script_id, byte reps, byte pos);
BlinkM_stopScript(byte addr);
BlinkM_setScriptLengthReps(byte addr, byte script_id, byte len, byte reps);
BlinkM_writeScriptLine(byte addr, byte script_id, byte pos, byte dur,
                                byte cmd, byte arg1, byte arg2, byte arg3);
BlinkM_writeScript(byte addr, byte script_id,
                          byte len, byte reps,   blinkm_script_line* lines);
And More
For more information, including a datasheet, example code and sequencer application for Mac/Windows/Linux visit blinkm.thingm.com.
If you want to talk about BlinkM, leave a comment or participate in discussions on ThingM’s Satisfaction page.
Hi Chris,
If you mean this Arduino Pro, then yes, you should be able connect to Analog pins 2,3,4,5 (or pins 5V,Gnd and Analog pins 4,5), just like a normal Arduino.
I was just wondering how I could connect the blinkM to my arduino pro mini? and also if i was to use analogue plugs A1 and A2, how and where would i need to edit the communication code?
many thanks
Hi Giovanni,
I’m not quite sure what Arduino sketch you’re working from. And it’s unclear what you mean by “not work”. Do you mean does not compile? Because the code snippet you list is missing an ‘=’ between “hue” and “127”. E.g. that line should read:
Tod,
any ideas why something like this does not work:
hue 127;

blinkm_script_line script1_lines[] = {
  {1,  {'f', 10, 00, 00}},
  {25, {'h', hue, 0xff, 0xff}},  // Custom Color
  {25, {'h', 43, 0x00, 0xff}},  // Bright White
};
If I replace hue inside the array with a number it works fine…been scratching my head about this for awhile now.
Hope you can help,
-G
Hi mcozire,
Because BlinkMs communicate via I2C, all the Arduinos need the same number of pins to control all BlinkMs: two (not including 5V & Gnd). These two pins are called “SDA” and “SCL”, on the BlinkM they are abbreviated “d” and “c”.
With the traditional Arduino, SDA & SCL due double duty with Analog In pins 4 & 5. On the Arduino MEGA, SDA & SCL have their own dedicated holes.
Now as to how many you BlinkMs you can control over these two pins, theoretically it’s up to 120. In practice you start to run into issues with cable length and power requirements (each BlinkM can draw up to 60mA of current, and a USB-powered Arduino can supply about 450mA of current)
I’ve regularly driven 8 BlinkMs off a USB-powered Arduino on a 3-ft cable. My BlinkM Cylon project used 13 BlinkMs on a 6-ft cable.
Hi there!! Love the look of these BlinkMs.
I was just wondering.. if I get a Arduino Mega.. how many BlinkMs could I connect directly to it?
Also I want to be able to place BlinkMs along a meter long box, with the arduino situated at the back of it. Is this possible? Do I just need long wires from the BlinkMs connecting directly to the to Analog Ins on the Arudino Mega?
Many thanks!
Love the BS2Px robot idea. Got any pics or links?
As for reprogramming scripts 1-16, the short answer is “no, not yet”. A more detailed answer is here: http://getsatisfaction.com/thingm/topics/re_program_scripts_1_through_16
Tod,
I just put 2 BlinkM-s as headlights / moodlights / statuslights on my BS2Px based robot and my kids are going nuts with it.
Forgive me if I missed the discussions on this – did you make changes to the firmware that allow us to re-program all 16 scripts, or we’re still at script 0 only?
Thanks for making one of the most fun little gadgets ever (I’m also waiting for my Max, this will be used with a pot to create mood light in a room…)
Hi BlackFire,
Wow, that’s a lot of BlinkMs! You should contact us directly to help out for your project.
There are a variety of issues when dealing with large numbers of I2C devices. One is, as you guessed, that standard I2C has a 7-bit address space so can only address up to 127 devices (really around 100 due to some reserved addresses) The Arduino is a standard I2C master, so figure 100 BlinkMs per Arduino. The Arduino really has no provision for multiple I2C buses. There are ways around this, like with I2C bus switching chips, but can get complex. But with 100 BlinkMs/Arduino, you’d be controlling 10 Arduinos, which can be done with a single PC pretty easily.
Another issue with large numbers of I2C devices is bus length (really, bus capacitance). As either the length of the bus increases or the number of devices increase, each device has to work a bit harder to wiggle the I2C signal lines. What you’ll see is as you add devices or increase the length of the cable, things will start getting flaky. I’ve only experimented with up to 24 BlinkMs on a 30 foot cable. (I can never keep enough in-house to try out a larger experiment) There are I2C bus driver chips to help out with this issue. I’ve been meaning to investigate these chips to once and for all solve the “long BlinkM cable” question.
I am putting together a large lighting project that will require almost 1000 BlinkM’s. I Know the IC2 on one Arduino can handle 100-127 Blink M’s (with seperate power source)
Is it capable of doing multiple IC2 data lines? or will I need to get multiple boards and another as a master board to run them?
Or, would you reccoment a better way to run all of the individual BlinkM’s? The color patterns are not too precise but I would like to at least have some control over them.
Tod;
Received my Blinkm yesterday, and was up until midnight turning my living room into a disco with it. This thing is very cool! Two questions: How much brighter is the MaxP? And secondly, I’ve seen a couple of sites selling I2C bus extenders. Have you ever used one of these? It would be great to get 3 to 5 feet between each Blinkm, so, for example, I could place one in each corner of my cubicle, as my “mood indicator” (Then to an ultrasonic pinger so the blinks would grow read as the boss walked closer…)