Intro to the Arduino Entrepreneurial Ecosystem slides & audio

[originally posted on the ThingM blog]

The theme for the Caltech Entrepreneurs Forum’s November event was “The Internet of Things, Arduinos and the ‘Maker Entrepreneur’“.

caltech-entforum-talk-normal.001

My talk “Intro to the Arduino Entrepreneurial System” touched on all these topics. The entire event was a blast, including a wonderful talk about commercial making with open source by Quinn of QtechKnow.

Slides with notes and MP3 audio of the entire event are below.

Download MP3 of the entire Forum proceedings, including Tod’s talk.

MakerFaire Bay Area 2013 and my talk on blink(1) & Kickstarter

[originally posted on the ThingM blog]

makerfaire

Whew, MakerFaire Bay Area 2013 is over and it was astoundingly fun. Not only did we get to interact with so many people doing awesome things with ThingM products (like these BlinkM MinM earrings) but we got to show off a bunch of projects made with blink(1) and BlinkM-family stuff to thousands of new people. We heard tallies of 120,000 people showed up over the weekend, and we love seeing the concepts the Maker community inspires diffusing out into the larger world, as this LA Times article speaks to.

This year not only were we fortunate enough to have a ThingM table in the Maker Shed (Thank you Leah, Alex, Will, Carlyn, & Mike for helping staff it), but we also gave talks. Mike spoke about the future of manufacturing in a work filled with Maker-inspired tools and techniques, while I gave a talk on the process we went through to take blink(1) from an idea to Kickstarter to production.

Slides from my talk are below.

Announcing blink(1) mk2, the USB RGB LED, improved

[cross-posted from the ThingM blog]

photo-main

We’re working on an improved version of blink(1) and have launched a Kickstarter for it.

blink(1) mk2 is an updated version of the blink(1) super status light. The original blink(1) made it easy to connect any data source in the cloud or on your computer to a full-color RGB LED so you can know what’s happening without checking any windows, going to any websites or typing any commands. blink(1) mk2 maintains backward-compatibility while adding better functionality and great new features.

The main new features are:
– Better USB support
– Brighter via dual RGB LEDs
– Independently-addressable LEDs
– Improved Blink1Control application

We think it’s going to be great.
blink1mk2-ani

BlinkMuino updated for Arduino 1.0 (finally)

I finally got around to updating the BlinkMuino guide for turning your BlinkM, BlinkM MinM, or BlinkM MaxM into a tiny ATtiny85 or ATtiny84 Arduino system. BlinkM boards make great tiny development boards, especially if you’re interested in driving LEDs. BlinkM MaxMs are particularly great because they have more inputs and those three beefy MOSFET power transistors. And MinMs are good because they’re super tiny, but still contain a fully-programmable computer.

Thankfully, the ArduinoISP sketch has also been updated for Arduino-1.0, meaning you can use your Arduino as an AVR-ISP programmer, like this:

blinkmuino-arduino-500px

Here’s the original video I made about BlinkMuino:

We’ll be showing off some examples of BlinkMs programmed with Arduino at Maker Faire, some say “hi”!

Using FreeM with BlinkM MaxM

While FreeM is mostly designed to work with BlinkMs and MinMs, it can be made to work with MaxMs. FreeM cannot supply the power that MaxMs need (250mA and FreeM can only supply up to 100mA), but there are other ways. One way to do it is to power the FreeM from the MaxM’s built-in 5V power supply.

To do this, get a MaxM, a FreeM, a small scrap of wire, and a 12VDC power supply.

FreeM with MaxM

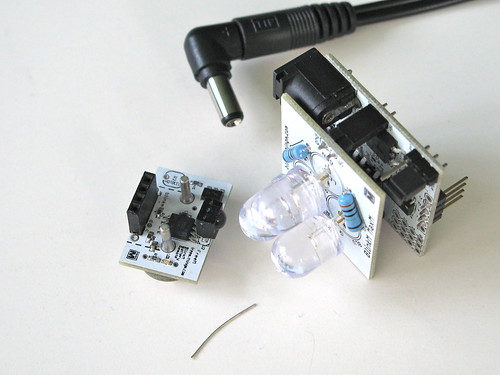
Remove the “pwrsel” jumper and wrap the small piece of wire around all three pins of the “pwrsel” jumper. Then plug the FreeM into the bottom of the MaxM and plug in the 12VDC power supply to the MaxM.

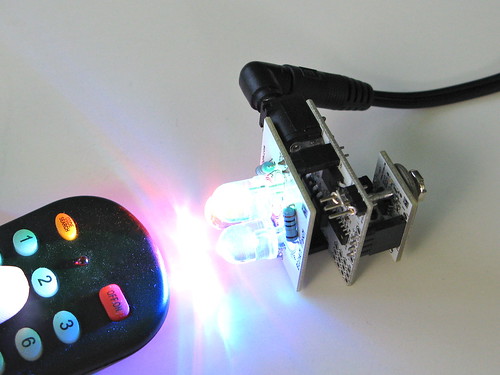
The MaxM will power the FreeM and the FreeM will control the MaxM.

FreeM with MaxM

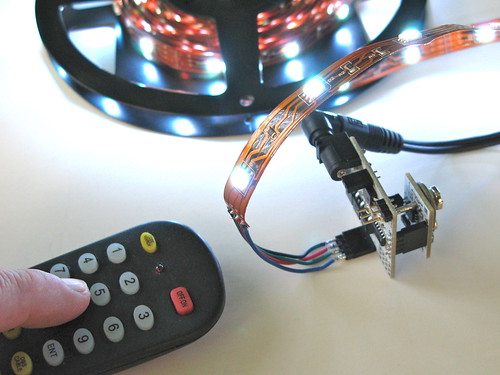
You can also now control other LED clusters like flexible RGB LED tape.

FreeM with MaxM

BlinkM Battery Pack HowTo

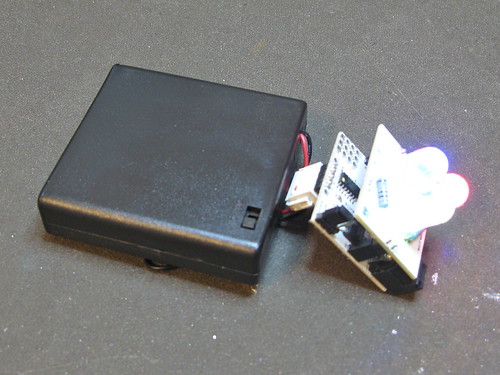
BlinkM Battery Pack: Done!

Make a long-lasting, rechargeable battery pack for your BlinkM MaxM, BlinkM, or BlinkM MinM using just pliers, no soldering!

BlinkMs are perfect for portable, stand-alone uses. There are many ways to hook a BlinkM to battery sources. Here’s one way that works for all BlinkMs.

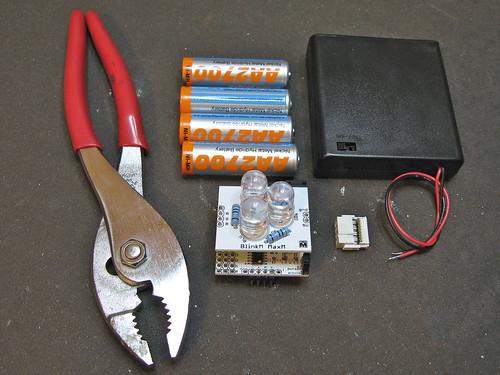
BlinkM Battery Pack: Step 1: Get all the parts together

BlinkM Battery Pack: Step 1: Get all the parts together

Parts are:

BlinkM MaxM, BlinkM, or BlinkM MinM

– 4xAA battery holder with switch, like this Jameco one or Mouser one

– 4xAA NiMH batteries (not alkaline!)

– 2×8 IDC crimp connector (FCI 71600-308LF), from Digikey 609-3570-ND or Mouser 649-71600-308LF

Tools you’ll need:
– pliers with wide jaws to crimp
– cutters to trim excess wire

Continue reading “BlinkM Battery Pack HowTo”

ReflashBlinkM: Update your BlinkM’s firmware

All BlinkM-family devices can have their firmware updated. This makes them great for tiny development boards for ATtiny processors. ReflashBlinkM is an application that makes it easy to put back the original firmware or update a BlinkM to the latest firmware.

Previously you needed an AVR ISP programmer like the AVRISPmkII or the USBtinyISP. Thanks to the ArduinoISP sketch that ships with Arduino, if you have already have an Arduino, you can easily reflash your BlinkM with new firmware.

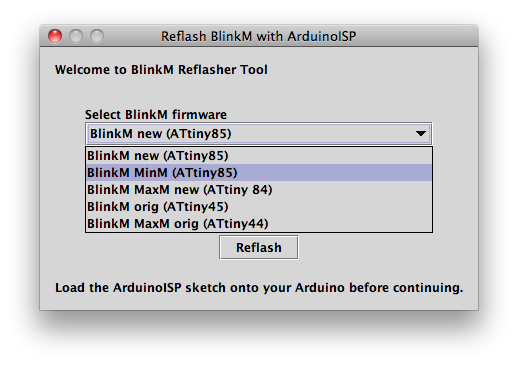
The ReflashBlinkM application is a tool for Mac OS X and Windows that uses ArduinoISP to help you reflash BlinkMs to their default firmware.

This is what it looks like:

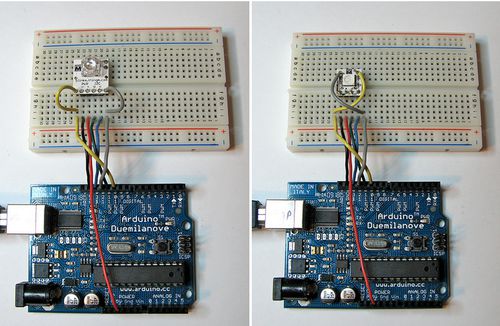
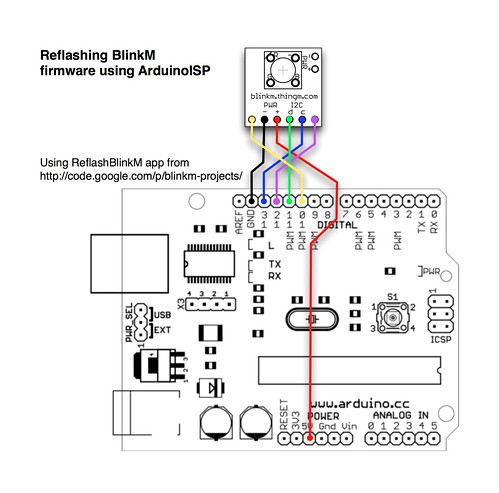
Here’s one way of hooking up a BlinkM to an ArduinoISP:

And here’s a video of a BlinkM MinM being reflashed:

For full instructions, see the ReflashBlinkM page in the blinkm-projects Google code site.