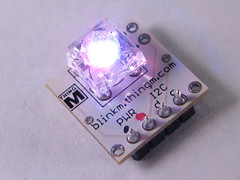
This is a BlinkM:
BlinkMs are “smart LEDs”, a type of smart interface component. A BlinkM consists of an ultrabirght RGB LED backed with a microcontroller with built-in knowledge about 24-bit color spaces, color fading, and color pattern generation. All in a package 0.6” wide. You talk to it over I2C, a serial protocol spoken by many different things. (Arduino speaks it, as do Basic Stamps, and your PC) And you can have over 100 BlinkMs on the same serial bus, each individually addressable. Here’s how they can hook up to an Arduino:
BlinkMs are available from SparkFun (US) and Little Bird Electronics (AU). It’s hard to show in just static pictures how fun and easy it is to play with BlinkMs, so here’s a few quick video guides.
A demonstration of one of the example Arduino sketches “BlinkMTester”, which lets you exercise a BlinkM by typing simple commands to the Arduino.
Exampe Code
There are a couple of examples of how to talk to BlinkMs all zipped up in BlinkM_Examples.zip. You can also peruse them unzipped if you like. The examples are predominately for Arduino currently, but any I2C master will work. Some of the examples so far:
BlinkMCommunicator
A simple serial-to-i2c gateway for PC controlling of BlinkM (for instance via Processing or the BlinkM Sequencer)
BlinkMTester
A general tool to play with a single BlinkM
BlinkMMulti
An example showing how to communicate with multiple BlinkMs
BlinkMScriptWriter
A demonstration of how to write BlinkM light scripts with Arduino
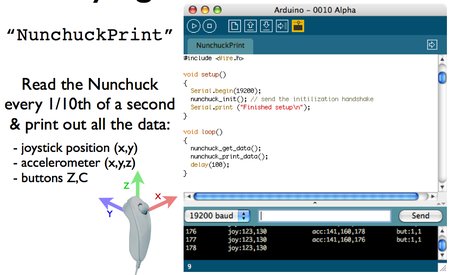
BlinkMChuck
Control the hue & brightness of a BlinkM with a Wii Nunchuck
More examples will be added periodically.
For the Arduino examples, a convenience library called BlinkM_funcs.h has been created. Just drop this .h file into your sketch folder and call the functions to start playing with BlinkM.
The complete list of functions is below, though you’ll probably only use a few of them for a particular project.
With BlinkMs available for purchase soon, I figured it would be neat to show what a large collection of them can do. BlinkMs were created from my desire to have a “smart LED” that did its own tri-color PWM. I didn’t want to build a real-time system to control the PWM of several hundred RGB LEDs. And existing LED controllers didn’t meet my needs. I wanted something that knew a bit about color and color patterns and could be networked together into clusters. Thus BlinkM. A single BlinkM is fun, but the real utility is seen when you have several of them on the same I2C network.
Below are two movies of the lighting system in WineM, our smart RFID winerack. Each place a bottle goes contains a essentially BlinkM and RFID reader controlled via an I2C master.
WineM prototype at NextFest
This video shows WineM in use. A handheld web device allows one to select and display different facets of the wine collection. In the video, first all wines are shown, colored by varietal, then Cabernet wines are selected. Within the Cabernets, color them by year. Select 2002 as the year and only the 2002 Cabernets are shown. Then color those by price. Finally, select the 2002 cabernets that are between $20-$30. You’re left with the perfect wine for tonight’s meal. Also shown is the visual indication when bottles are added or removed.
WineM prototype light tests
This is just a light show using the WineM lights. It was taken right after I had assembled and installed everything in the rack. Apologies for the exposure fluctuations.
For a bit more detail on the WineM prototype hardware, see this post.
Mark Allen of Machine Project is teaching an Arduino course using some of the notes from my Bionic Arduino class. He and his students were seeing in Windows XP & 2000, when trying to getting Processing to talk to Arduino, the cryptic error:
  gnu.io.PortInUseException: Unknown Application
               at
  gnu.io.CommPortIdentifier.open(CommPortIdentifier.java:354)
Both his class and Mark and I separately spent a lot of time trying to figure out what the problem was. Eventually we discovered that it’s because the sketch I had written had a setup() like this:
  void setup() {
    port = new Serial(this, portname, 19200);
    size(400,400);
  }
but instead should have been like this:
  void setup() {
    size(400,400);
    port = new Serial(this, portname, 19200);
  }
Yes, size() must come before new Serial() on Windows or it will not work. There is a bug report describing a similar problem and is marked RESOLVED, INVALID because as the reference documentation for size() states, “The size() function must be the first line in setup()”.
I’ve been using Processing for a long time and I found this feature of size() surprising. I always figured size() to be just a dimensioning function, not a critical part of sketch startup. I’ve seen many sketches that apparently function correctly where size() is located outside of setup() or is not the first statement in setup(). Perhaps the Processing sketch parser should check the sketch before running it to make sure not statements come before size().
I apologize to any Windows users attempting to use the Processing sketches I wrote for Bionic Arduino. I’ve updated the sketches appropriately so the above issue doesn’t come up.
It will cover many of the same topics covered in my previous Spooky Arduino and Bionic Arduino courses. So if you’re near L.A. and want to have some fun programming computers the size of your finger, sign up now! Machine Project classes usually sell out in a day or so.