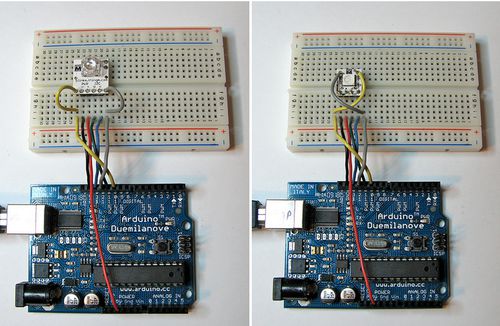
I finally got around to updating the BlinkMuino guide for turning your BlinkM, BlinkM MinM, or BlinkM MaxM into a tiny ATtiny85 or ATtiny84 Arduino system. BlinkM boards make great tiny development boards, especially if you’re interested in driving LEDs. BlinkM MaxMs are particularly great because they have more inputs and those three beefy MOSFET power transistors. And MinMs are good because they’re super tiny, but still contain a fully-programmable computer.
Thankfully, the ArduinoISP sketch has also been updated for Arduino-1.0, meaning you can use your Arduino as an AVR-ISP programmer, like this:
Here’s the original video I made about BlinkMuino:
We’ll be showing off some examples of BlinkMs programmed with Arduino at Maker Faire, some say “hi”!


Hi! I just came back from the Maker Faire San Mateo and saw your products in the Maker Shed.
http://bit.ly/1caXnVK
http://bit.ly/1LveFK5
I picked up a BlinkM, LinkM, and NeoPixels with the goal of recreating the project above to put inside of a Battlestar Galactica Cylon helmet for Comicon. I wanted to know if you could share some more details about connections in this picture. I am using this project to learn more about electronics components. I have gotten the LinkM to communicate with the BlinkM and have been sending it some sequences! The BlinkMSequencer2 software made is super easy :)
My next step will be to figure out how to give it the Cylon Scanning Squence like this:
https://www.youtube.com/watch?v=UW2_cEKGV68
This is why I got the BlinkM! So I don’t have to fit an Arduino in my helmet!