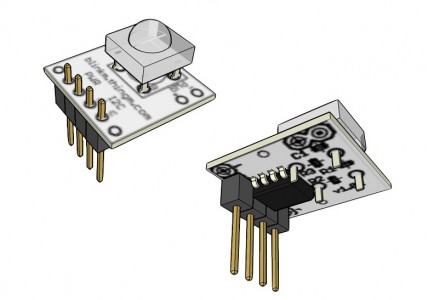
Here’s a really quick 3D model of BlinkM, if anyone needs it. It’s accurate to ~0.1mm.
– blinkm.skp — BlinkM SketchUp model
– rgb_led_piranha.skp — Piranha RGB LED SketchUp model
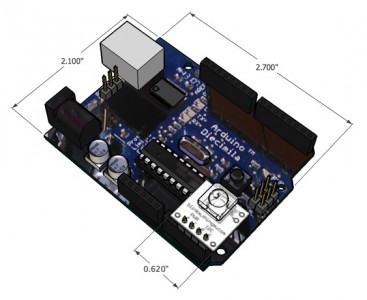
And here it is plugged into the awesomely done Arduino Diecimila model by Jon-Paul from the Google 3D Warehouse.
SketchUp is pretty great, but I found a problem with it if you’re trying to make accurate to-scale electronic parts: it won’t create surfaces with an area of <1mm. Took me a while to figure that out. The solution is to make a 10x or 100x size version and then do a scale by 0.1 or 0.01 when you’re done.


Yup, common-cathode.
Thanks for the reply! I feel a little silly now. But one more stupid question (if you can’t embarrass yourself on the Internet, where can you?). I just want to double check, those Piranhas are common cathode right?
Hi Jon,
It’s a standard 0.1uF bypass capacitor, in an 0805 size I think. It’s not labeled because in the datasheet because I’m so used to bypass caps always being 0.1uF that I assume everyone thinks that.
Any chance you know the value of the capacitor on the blinkm? I understand if you aren’t able to give that out. It isn’t labeled on the schematic.
A LinkM that had I2C bus drivers would be nice. More drive has made things a lot less troublesome when doing long runs or large numbers of modules. Being more of a hardware type, the better sequencer as part of the package probably caught my attention more. I rolled my own version of MaxM in May for a June wedding project. Initially for better output mixing and a bit more light, a last minute change by the bride made being able to remote the LEDs on leads really useful.
How expensive is expensive? You can use an Arduino as a USB-to-I2C converter and they cost ~$30. If you’re handy with electronics, there are several DIY USB-I2C adapters out there.
Do you have any information regarding using a BlinkM directly from a PC without an (expensive) usb I2C adapter?
Hi Greg,
We’re still trying to figure out exactly what LinkM should be. For your own purposes, what would you like in a BlinkM interface box that an Arduino doesn’t provide? Or are you referring to BlinkM MaxM, the high-power BlinkM driver board? We just received the BlinkM MaxMs in and will be packing them up to send to our distributors soon.
Any word on LinkM these days? I rolled my own higher brightness BlinkM clones for a couple of projects but would much rather buy qty:1 LinkM.
Ah, you’re right. I’m so used to Flickr, Delicious, and other tag-based things that just use whitespace. Thanks, and fixed.
Sorry to nitpick, but you need to comma separate your tags on the warehouse, I think. Your tags on your model are all stuck together.
Ah, Yeah.. you’re right.. that sucks! For some reason I never ran into that one.
I had similar problems with the small parts. Scale is your friend. Thanks for the model!
Good idea, Aaron, I uploaded both to the Warehouse.
And I should have been more explicit in what I meant about drawing small parts in SketchUp: you can draw boxes smaller than 1mm in area, but SketchUp won’t generate a surface. This means you can’t push/pull it or do face-based inferences on it. Others have had similar problems (see here & here).
Great! Be sure to actually put it in the sketchup warehouse though.. so people can access it just like the arduino boards and parts already there. I’ve suggested the “Make Parts” tag, and got Jon-Paul to add it to his when they hit the make blog.
Also, a minor correction, you can make stuff of any size in sketchup (i just made a .05mm box), you may have had a problem with the default snapping behavior. Go to Window | Model Info | Units, and set format to decimal millimeters.. that might help. Or enter any length dimension just after you draw a line (eg .05mm) and hit enter.