listComPorts – Windows command-line tool for USB-to-serial

Did you know each Arduino has a unique serial number in its USB interface that you can use to distinguish one Arduino from another? If you deal with multiple Arduinos, knowing exactly which one is plugged into your computer can be a real time-saver. But actually getting at this serial number and mapping it to COM ports can be challenging.

For Windows computers, here’s “listComPorts”, implemented both in GCC C code and in VBScript, both available from my usbSearch github repository.

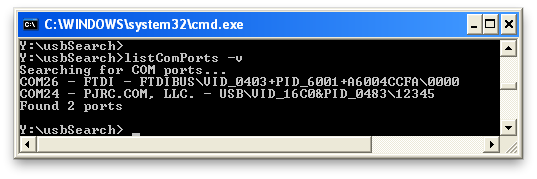
It gives the COM port number, the manufacturer name, the USB Vendor ID and Product ID (VID & PID) and the serial number. The result is a concatenation of the VID, PID, and serial number that Windows calls a “PnPDeviceID”. You can use the whole thing, or pick off the parts you need using simple string processing libraries. In the example above, the Arduino Diecimila has a VID/PID pair of 0403/6001 and the Teensy has a VID/PID of 16C0/0483.

Arduino Serial Numbers

In the above example, the Arduino Diecimila (which has an FTDI chip) has the serial number with a “+”-sign after the PID. So, the serial number is “A6004CCF”. The Teensy can have a programmable serial number and by default it’s set to “12345”.

With Arduino UNOs and future Arduinos, the Arduino team has their own VID/PID pair, which let’s them assign different PIDs for different classes of Arduinos. The UNO also has a much longer unique serial number than older Arduinos using the FTDI chip.

Here’s an example with two Arduino UNOs:

The serial numbers are separated by the VID/PID pair with a backslash. So my two UNOs have the serial numbers “64936333936351408161” and “6493234373835191F1F1”. Using this info, I can be sure exactly which Arduino I’m dealing with.

How it works

The C and the VBS versions both utilize the WMI infrastructure that’s been around since Windows 2000 to query the machine about its configured PnP devices. The WMI is a huge data structure of just about any information in Windows. Except, it seems, good information about COM ports. While there is a “Win32_SerialPort” table in WMI, that only contains information about hardware serial ports, not USB-to-serial adapters. Instead, these two tools look at the “Win32_PnPEntity” table. While this table does list USB-to-serial adapters, it does not contain a proper mapping of the adapter’s USB or PnP ID to COM port. Instead, these tools do a string search on the “Caption” field for the string “(COMn)” where “n” is a number. It’s an incredible hack but seems to work.

Other operating systems

On Mac OS X and pre-UNO Arduinos, knowing exactly which Arduino you were dealing with was easy because the FTDI driver put its serial number as part of the name of the serial port. For example, the port name created by the FTDI driver was “/dev/tty.usbserial-A6004ccf” and the serial number was “A6004ccf”.

With the UNO, the Arduino team used a reprogrammable ATmega8/16u USB chip using standard CDC USB-to-serial interface, which all OSes support natively. Unfortunately, on Mac OS X, the OS’s CDC driver creates a serial port for the UNO based on USB port location, not Arduino serial number.

Thus where you plug in the UNO into determines its serial port name. For instance, on my Mac, plugging in an UNO with serial number “64936333936351408161” gives a serial port with the name of either “/dev/tty.usbmodemfd131” or “/dev/tty.usbmodemfa141” depending on which USB jack is used. Even if you plug in a different UNO in the same jack, you’ll get the same serial port name. This is useful for some applications, but not if you need to know exactly which UNO you’re dealing with.

For Mac OS X, I use a tool I wrote called listArduinos.pl. It tries to determine the serial port names of every Arduino Uno. It’s out looks like:

bokbok% ./listArduinos.pl         
Finding Arduino UNOs...
/dev/tty.usbmodemfd131 - 0x2341/0x0001 - 6493234373835191F1F1
/dev/tty.usbmodemfa141 - 0x2341/0x0001 - 64936333936351400000
Found 2 Arduino UNOs
bokbok% 

BlinkM Cylon mkII

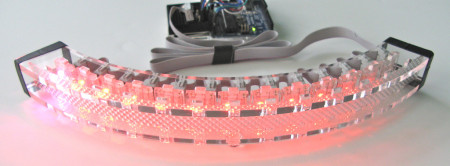
For Maker Faire this year I made a second version of my BlinkM Cylon: BlinkM Cylon mkII. This is not a very cost-effective way of getting a Cylon effect. It however is a good way of showing how to wire up multiple BlinkMs with a long cable, using our new WireM cabling kit for BlinkM. And unlike normal Cylon circuits, this has full RGB color effects and gradual fading.

BlinkM Cylon mkII

Here’s a quick video showing it in action.

BlinkM Cylon mkII consists of:
– 13 BlinkMs (one for each of the tribes of Kobol)
– one WireM cabling kit for BlinkM, consisting of IDC connectors and ribbon cable
– an Arduino
– two 4.7k resistors
– a single push-button
– 9VDC wall wart to power it all.
– laser cut acrylic enclosure

Below are all the files needed to recreate your own BlinkM Cylon. Click any of the images for larger versions.

Continue reading “BlinkM Cylon mkII”

WiFi for Arduino with Asus WL-520gu

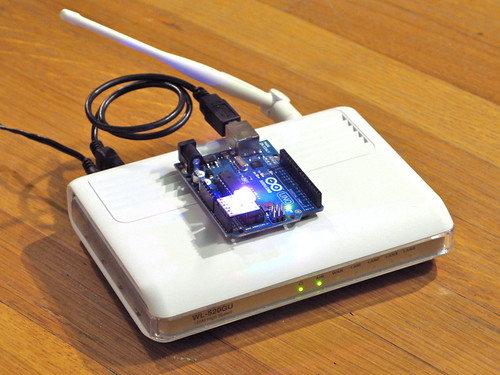
I love Arduino but its lack of wireless bugs me. And it sucks that WiFi Shields for the Arduino cost as much a cell phone. I want something cheap. Turns out, small, cheap WiFi routers like the Asus WL-520gu can run the DD-WRT Linux firmware and act as serial-to-network gateway for Arduinos (or most any other USB device). Here’s how to do it.

(Hey, is this a Wifi-controlled BlinkM? I think it is.)

A quick video showing a router acting as a serial-to-network gateway:

This is not that new of a concept, hacking Linux onto a router for some neat DIY purpose. One of my favorite past hacks is MightyOhm’s WiFi Radio project. And of course, see my own book Hacking Roomba for an example of how to put a Roomba on the Net.

This post is specifically about trying to make a DD-WRT router a transparent gateway for an Arduino.

The steps are:

  1. Install DD-WRT Firmware
  2. Configure Router to be WiFi Client
  3. Do Some Tests
  4. Install USB Serial Drivers
  5. Install Serial-to-Network Proxy

Continue reading “WiFi for Arduino with Asus WL-520gu”

ReflashBlinkM: Update your BlinkM’s firmware

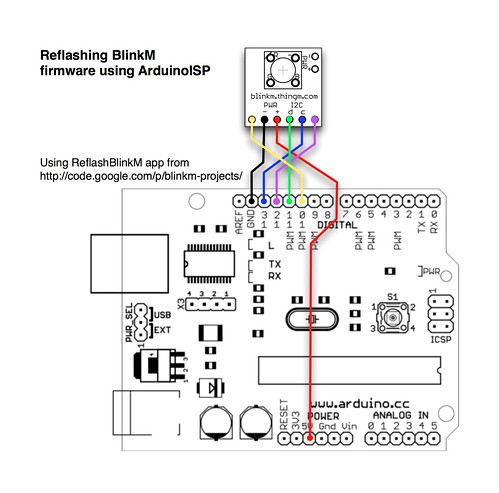
All BlinkM-family devices can have their firmware updated. This makes them great for tiny development boards for ATtiny processors. ReflashBlinkM is an application that makes it easy to put back the original firmware or update a BlinkM to the latest firmware.

Previously you needed an AVR ISP programmer like the AVRISPmkII or the USBtinyISP. Thanks to the ArduinoISP sketch that ships with Arduino, if you have already have an Arduino, you can easily reflash your BlinkM with new firmware.

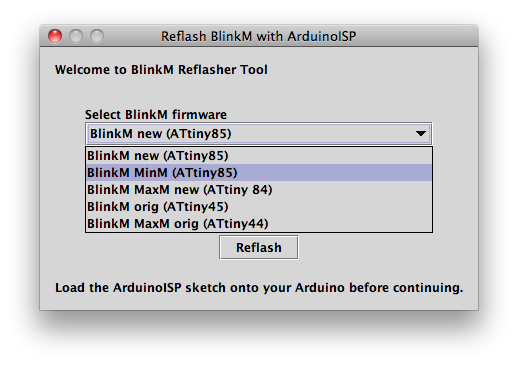
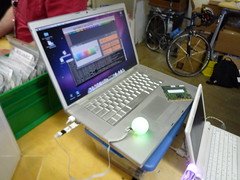
The ReflashBlinkM application is a tool for Mac OS X and Windows that uses ArduinoISP to help you reflash BlinkMs to their default firmware.

This is what it looks like:

Here’s one way of hooking up a BlinkM to an ArduinoISP:

And here’s a video of a BlinkM MinM being reflashed:

For full instructions, see the ReflashBlinkM page in the blinkm-projects Google code site.

SoftI2CMaster: Add I2C to any Arduino pins

[update 20150128: changed links to SoftI2CMaster project on Github]

Ever wanted to use any pair of pins for I2C on Arduino, not just the dedicated pins on Analog 4 & 5? Me too, so I made a quick little Arduino library called “SoftI2CMaster”, available in the “blinkm-projects” Googlecode repository.

Get it here: SoftI2CMaster on github

It’s still a work in progress, but it can write data pretty successfully and do it over longer cables than normal.

For the VIMBY/Scion Hackerspace Challenge, I created an array of BlinkM MaxM-powered accent lights for the device we made. Because the I2C cable was longer than a few feet, the normal Wire library that BlinkM_funcs.h uses to communicate with BlinkMs couldn’t be used. This is because the Wire library assumes a perfect bus. If there is any noise or other bus problems, the Wire library will currently lock up. For the SoftI2CMaster library, I wanted it to be very tolerant, even lazy, about bus problems and also have more tunable timing to let you slow the bus down. Of course, you still need pull-up resistors on the two lines. I’ve found using 2.2k resistors to be good.

The SoftI2CMaster API follows Wire’s API pretty closely:

  • SoftI2CMaster(sdaPin,sclPin) — create an new SoftI2CMaster for the two pins specified
  • beginTransmission(address) — begin sending data
  • write(data) — send some data (byte or byte arrays)
  • endTransmission() — stop sending data

In use it looks something like this:

#include "SoftI2CMaster.h"
const byte sdaPin = 7;
const byte sclPin = 6;
SoftI2CMaster i2c = SoftI2CMaster( sdaPin,sclPin );

i2c.beginTransmission( 9 );  // write to address 9
i2c.write('c');
i2c.write(255);
i2c.write(0);
i2c.write(200);
i2c.endTransmission();

There is a simple demo for BlinkMs that this library currently lives in. It’s called “BlinkMSoftI2CDemo” and shows off a simplified BlinkM_funcs called “BlinkM_funcs_soft.h“. The entirely of BlinkMSoftI2CDemo is shown below.

const byte sdaPin = 7;  // digital pin 7 wired to 'd' on BlinkM
const byte sclPin = 6;  // digital pin 6 wired to 'c' on BlinkM

#include "SoftI2CMaster.h"
SoftI2CMaster i2c = SoftI2CMaster( sdaPin,sclPin );

// must define "i2c" before including BlinkM_funcs_soft.h
#include "BlinkM_funcs_soft.h"

byte blinkm_addr = 9;

//
void setup()
{
  Serial.begin( 19200 );
  Serial.println("BlinkMSoftI2CDemo");

  BlinkM_off(0);

  for( int i=0; i< 100; i++ ) {  // flash the blinkms
    BlinkM_setRGB( blinkm_addr, 255,255,255 );
    delay(10);
    BlinkM_setRGB( blinkm_addr, 0,0,0 );
    delay(10);
  }
}

void loop()
{
  byte r = random(255);
  byte g = random(255);
  byte b = random(255);
  
  BlinkM_setRGB( blinkm_addr, r,g,b );
  delay(10);
  BlinkM_fadeToRGB( blinkm_addr, 0,0,0 );
  delay(1000);
}

void BlinkM_off(byte addr)
{
  BlinkM_stopScript( addr );
  BlinkM_setFadeSpeed(addr,20);
  BlinkM_setRGB(addr, 0,0,0 );
}

ThingM at Maker Faire 2010

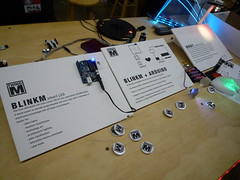
My company ThingM had an official presence at Maker Faire this year. We were showing off the BlinkM line, including the new BlinkM MinM and the LinkM USB BlinkM controller. It was a lot of fun. And packed!

ThingM at Maker Faire 2010
(click any photo to go to larger version on Flickr)

We were in the Maker Shed building, right underneath the Arduino banner, so we got lots of awesome questions about Arduino. The most common: “So I just picked up this thing that says ‘works with Arduino’…well, what *is* Arduino?” It was so great to see so many people interested in building their own gizmos.

ThingM at Maker Faire 2010 ThingM at Maker Faire 2010

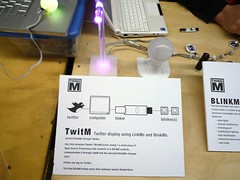
By far the most fun demo we had was TwitM, the Twitter-controlled BlinkM. Using LinkM, a couple BlinkMs, and a Processing sketch, I had it so anyone who tweeted anything with the keyword “makerfaire” made one BlinkM flash. If you tweeted “blinkm colorname”, where colorname was any color in the X11 color names or a hex color code RRGGBB, the other BlinkM would turn that color. Because of the streaming Twitter API, these changes happened instantly; it was really something to see.

ThingM at Maker Faire 2010 ThingM at Maker Faire 2010

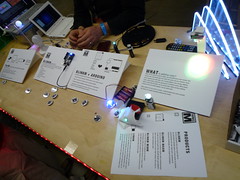
Kim and Mike made up some really nice “walltext” describing the various demos we had up.

ThingM at Maker Faire 2010 ThingM at Maker Faire 2010

A big hit was MaxM controlling RGB LED flexible circuit tape, using the same techniques I used for the Crystal Monster.

ThingM at Maker Faire 2010 ThingM at Maker Faire 2010

This was about regular busy at the Faire. There were many times when it got way more packed.