
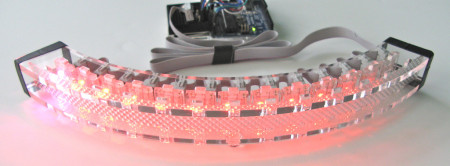
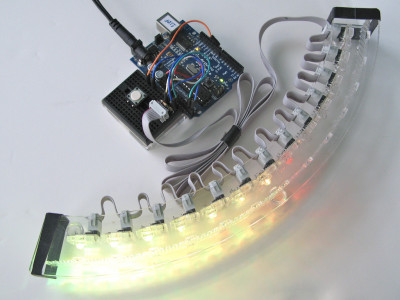
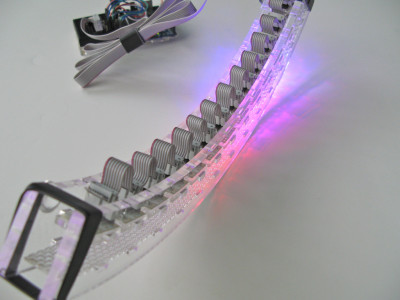
For Maker Faire this year I made a second version of my BlinkM Cylon: BlinkM Cylon mkII. This is not a very cost-effective way of getting a Cylon effect. It however is a good way of showing how to wire up multiple BlinkMs with a long cable, using our new WireM cabling kit for BlinkM. And unlike normal Cylon circuits, this has full RGB color effects and gradual fading.
Here’s a quick video showing it in action.
BlinkM Cylon mkII consists of:
– 13 BlinkMs (one for each of the tribes of Kobol)
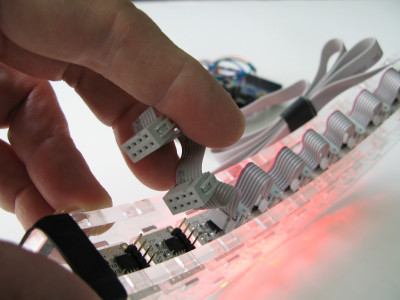
– one WireM cabling kit for BlinkM, consisting of IDC connectors and ribbon cable
– an Arduino
– two 4.7k resistors
– a single push-button
– 9VDC wall wart to power it all.
– laser cut acrylic enclosure
Below are all the files needed to recreate your own BlinkM Cylon. Click any of the images for larger versions.
Firmware
The sketch that runs on the Arduino is pretty straight-forward. It’s a minor update to the existing BlinkMCylon sketch. You can find it on the blinkm-examples Google code project. The files are:
– BlinkMCylon.pde – the actual sketch
– BlinkM_funcs.h – BlinkM library
Circuit
The circuit is 13 BlinkMs and one Arduino hooked up to a single 4-wire I2C bus (Gnd/+5V/SDA/SCL). Like this:

Because the I2C bus is fairly long, two pull-up resistors on SDA (aka ‘d’ on BlinkM) and SCL (aka ‘c’) are added.
To assemble the cable, position the IDC socket connectors where you want them, and crimp them together. For the BlinkM Cylon, the connectors are spaced about 3″ apart. For info on how to crimp the connectors, see the bottom of the Adafruit USBtinyISP page, here’s a highlight

Enclosure
The enclosure is made from laser-cut acrylic. It’s mostly clear 1/8″ (3mm) acrylic with the diffuser made from 1/16″ (1.5mm) acrylic ceiling fixture diffuser sheet. The plans for cutting your own of these are available in EPS and CDR format from Thingiverse, they look like:

To secure the BlinkMs, little BlinkM holders were created. Each BlinkM is hot-glue tacked to the holder and the holder is snapped into the base plate. The entire laser cut assembly is meant to snap together. To keep it together use rubber bands, some dabs of super glue, or proper acrylic cement to make a permanent installation.
Hi Brian,
At the moment, the best place to get get WireM kits is from the ThingM web store. If you have a favorite electronics seller that doesn’t stock WireM, let them know! :-)
Where can we purchase WireM kits? I can’t seem to find a US distributer. I can only seem to find it on WishYourGift for 17 euros. However, they want 50 euros to ship it back to the states :).
Sorry for late reply, I achieved communication and finished my project.Thanks for your help :D
Hi Mehmet,
Do you have pull-up resistors on your I2C bus? You should try 4.7k to start out, maybe moving to 2.2k if your bus length is greater than a meter or so.
First of all , thanks for that nice work . I am studying on a I2C bus project with 5 Arduino Duemilanove , 1 Master – 4 Slave , shortly I want to mention my project , one master will send some values to slave and slaves will produce PWM signals , but I have a little problem , I could not achieve communicate with 4 slave, I achieved communicate only with 3 slave , all slaves are on bus , but always one of them does not give response . Thanks for your help
Need something like a sonic range finder (like on my car’s bumber) to tell if some one or something is getting close, and change color accordingly, red for too close, green all clear. Like a proximty warning system for a motor cycle alarm.
That is neat. Should program it to change color according to your mood ;)
I would build one for my office: when it’s green come on in; when it’s yellow, approach with caution; when it’s red don’t bother knockin’.