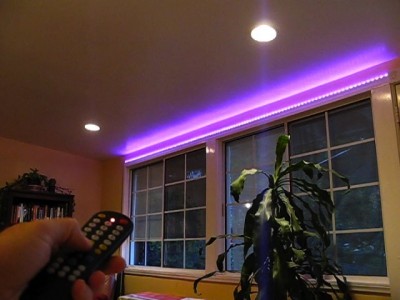
Sometimes you just want a little extra light in a room. With RGB LED tape, you can put light anywhere. But controlling its brightness and making it the color you want is a bit harder. A BlinkM MaxM can easily control LED tape, either as a stand-alone device, with an Arduino, or your computer via a LinkM. Stand-alone mode is great if you want a specific color or color pattern (the BlinkMSequencer makes this really easy) For this installation, I added a FreeM to the MaxM to let you control the light with a standard infrared TV remote control.
Another nice thing about the LED tape is that when it’s off, you can’t see where it’s installed.
Here’s a video showing how it all works.
How to make this
The parts you’ll need are:
– BlinkM MaxM
– FreeM
– RGB LED flexible tape
– 12V DC @ 1A power supply, you probably have this laying around
– Any universal TV remote, like this one
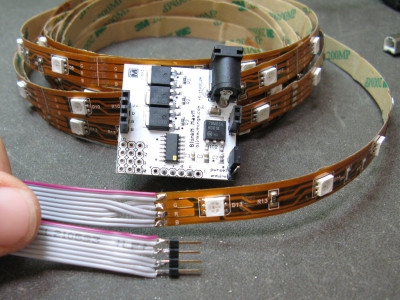
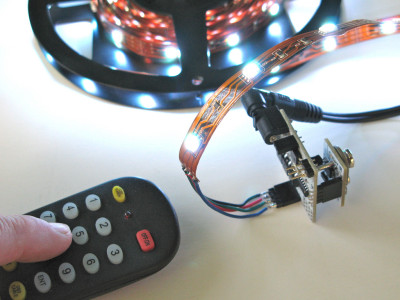
First up is to wire up the RGB LED tape with extension wires to go from the tape to the MaxM. This is so you can hide the MaxM where ever you feel like. Cut the wires to the length you need and solder them to the LED tape and a 4-pin male header like in the photo below. Note because the LED tape switches the Red and Green lines you’ll need to switch them because MaxM’s lines go V+,R,G,B.
With that done, you should be able to hook everything up and have the MaxM drive the LED tape. The LED tape takes +12VDC. The amount of current it needs depends on the length of tape your driving. Chances are you have a 12VDC @ 1000 mA wall wart power supply from an old piece of computer gear. That should work fine.
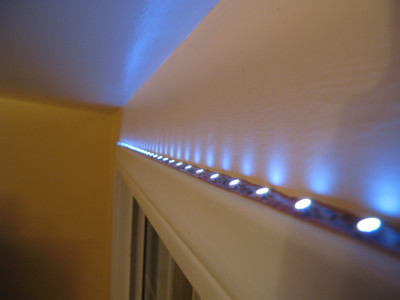
If you want your accent light to play a constant color or color pattern, you’re now done and can place the LED tape where ever you like, like on top of a window sill. Peel off the sticker backing and stick the LED tape where it should go.
Adding FreeM
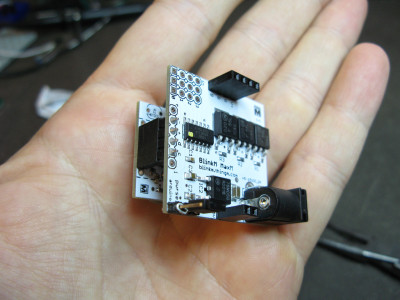
If you want to go the step further and add a FreeM to give your light a remote control, then follow the steps on the Using FreeM with BlinkM MaxM page.
But it’s really not much more than plugging the FreeM into the bottom of the MaxM.

Like this idea, hope I can manage to make it for my house. Great job!
Where do you buy or order this stuff?
I have checked a couple home centers and a couple lighting shops and nobody has heard of it.
Thanks
Tim, FunGizmos.com, SparkFun.com, Jameco, and most other electronics vendors who carry Arduinos also carry our products. You can find a larger list at the top of the BlinkM page.
Younis, what parts are you wondering about? There’s not much too it. I’ve updated the post to make the parts needed more explicit.
Michael, the LinkM C library is extremely cross-platform and works in Windows just fine. I’m not experienced in Visual Studio however, but one of our users is. We packaged up his work in the LinkM repo and placed it here:
– http://code.google.com/p/linkm/source/browse/trunk/tools/visual_studio/README.TXT
– http://code.google.com/p/linkm/source/browse/trunk/tools/visual_studio/
Rob, yes, all of the LED tape from DealExtreme will work with MaxM. (to be sure on the RGB tape, look for “common anode”)
Can someone point me to where to purchase these little gems?
Awesome! Can be pre-programmed with an Arduino, or even controlled from your phone using BT. Endless, clean indirect lighting!
Nice idea, could I get the list of the parts please.
Please suggest LinkM Library for c++ for Visual Studio. Is there any DLL or LIB?
Thank you!
This is awesome. I spent $500 on two Philips LivingColors lamps, and I’m wishing I would have found this first.
Would any of the LED tape here work? http://s.dealextreme.com/search/led+tape
I’m also wondering if this project can somehow tie-in: http://www.kickstarter.com/projects/606787527/the-tech-sync-power-system