I am a big fan of these PCM5102A I2S DAC boards (3 for $15! affilliate) for playing around with audio synthesis, for example in this video about new `synthio` CircuitPython library or this repository about Mozzi Arduino synthesis. They have pretty high-quality audio output up to at least 16-bit @ 44.1kHz and separate out all the audio circuitry onto its own board with its own regulator! This makes it much less likely that your circuit’s noise will infect your audio. And the line out is strong enough to drive most headphones. The board itself is pretty small too at 29mm x 16mm.
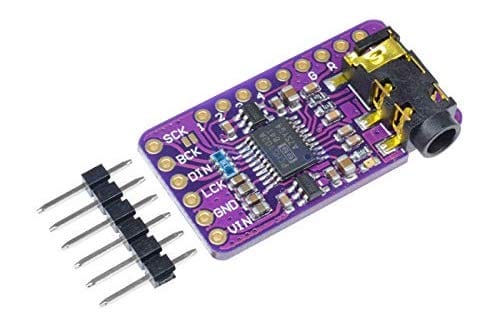
Hooking the up PCM5102 board is pretty easy for the general case:
- SCK – Gnd
- BCK – I2S bit clock pin
- DIN – I2S data pin
- LCK – I2S word select pin
- GND – Gnd
- VIN – 3.3V
In the case of hooking up the PCM5102 board to an Adafruit QT Py RP2040, one way to do that is like this:
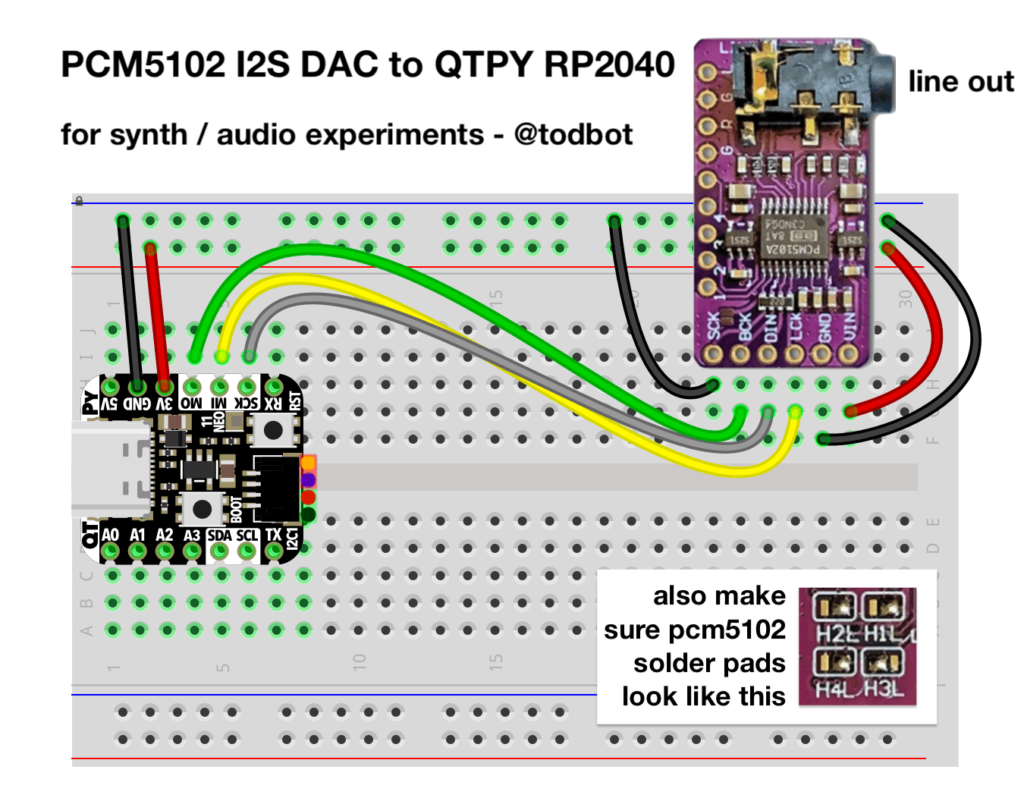
The corresponding CircuitPython setup using audiobusio.I2SOut() for the above wiring looks like:
import board, audiobusio
i2s_bck_pin = board.MOSI # PCM5102 BCK pin
i2s_lck_pin = board.MISO # PCM5102 LCK pin
i2s_dat_pin = board.SCK  # PCM5102 DIN pin
audio = audiobusio.I2SOut(bit_clock=i2s_bck_pin,
                          word_select=i2s_lck_pin,
                          data=i2s_dat_pin)
Note that the back of the PCM5102 board has several solder jumpers to configure the chip. Most vendors will set these to a good default value, but verify if they match the above inset photo above or the yellow box in the photo below.
Most of the information I gleaned about the PCM5102 board I got from this macsbug blog post. It is very handy. From it is also the schematic for the PCM5102 board, included below:

Here’s a complete SD-card based WAV player using a Raspberry Pi Pico and a PCM5102
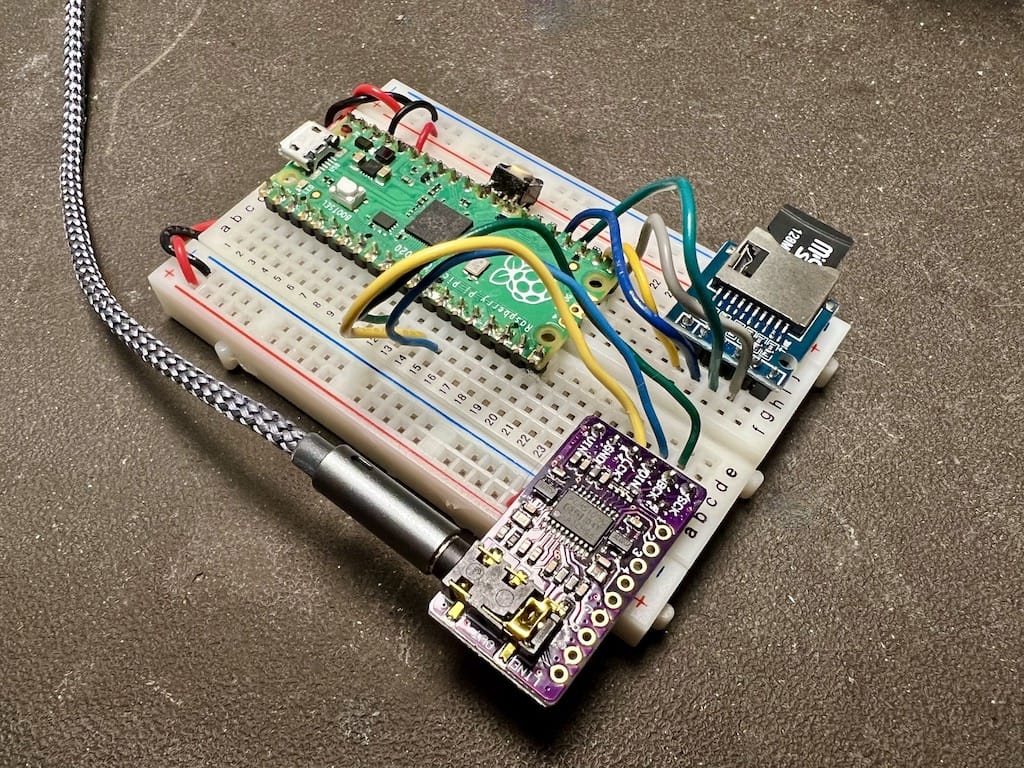
And the CircuitPython code that plays WAVs off an SD card:
# i2s_sdcard_pico.py -- I2S Audio from SD Card on RP2040 Pico
# 20 May 2022 - @todbot / Tod Kurt

import time
import board, busio
import audiocore, audiomixer, audiobusio
import sdcardio, storage, os

# pin definitions
i2s_bclk = board.GP9  # BCK on PCM5102 (connect PCM5102 SCK pin to Gnd)
i2s_wsel = board.GP10 # LCK on PCM5102
i2s_data = board.GP11 # DIN on PCM5102
sd_mosi = board.GP19
sd_sck = board.GP18
sd_miso = board.GP16
sd_cs = board.GP17

# sd card setup
sd_spi = busio.SPI(clock=sd_sck, MOSI=sd_mosi, MISO=sd_miso)
sdcard = sdcardio.SDCard(sd_spi, sd_cs)
vfs = storage.VfsFat(sdcard)
storage.mount(vfs, "/sd")

# audio setup
audio = audiobusio. I2SOut(bit_clock=i2s_bclk, word_select=i2s_wsel, data=i2s_data)
mixer = audiomixer.Mixer(voice_count=1, sample_rate=22050, channel_count=1,
                         bits_per_sample=16, samples_signed=True)
audio.play(mixer) # attach mixer to audio playback

# find all WAV files on SD card
wav_fnames =[]
for filename in os.listdir('/sd'):
    if filename.lower().endswith('.wav') and not filename.startswith('.'):
        wav_fnames.append("/sd/"+filename)
wav_fnames.sort()  # sort alphanumerically for mixtape numbered order

print("found WAVs:")
for fname in wav_fnames:
    print("  ", fname)

while True:
    # play WAV file one after the other
    for fname in wav_fnames:
        print("playing WAV", fname)
        wave = audiocore.WaveFile(open(fname, "rb"))
        mixer.voice[0].play(wave, loop=False )
        time.sleep(3)  # let WAV play a bit
        mixer.voice[0].stop()