I like minimal solutions to problems. I was playing with a CircuitPython-enabled QT Py on a breadboard with and a rotary encoder and I ended up making a USB knob, like many others have done before. But I realized: waitaminute, I can literally just plug the encoder directly onto the QT Py…
Thus was born the QTPy-knob. It’s one of the simplest USB knobs I’ve come across and it’s because the happenstance that a rotary encoder can usefully be plugged directly into a QT Py board and that CircuitPython is so powerful now it’s just a few lines to go from rotary encoder pulses to sending arbitrary USB keyboard or mouse commands.
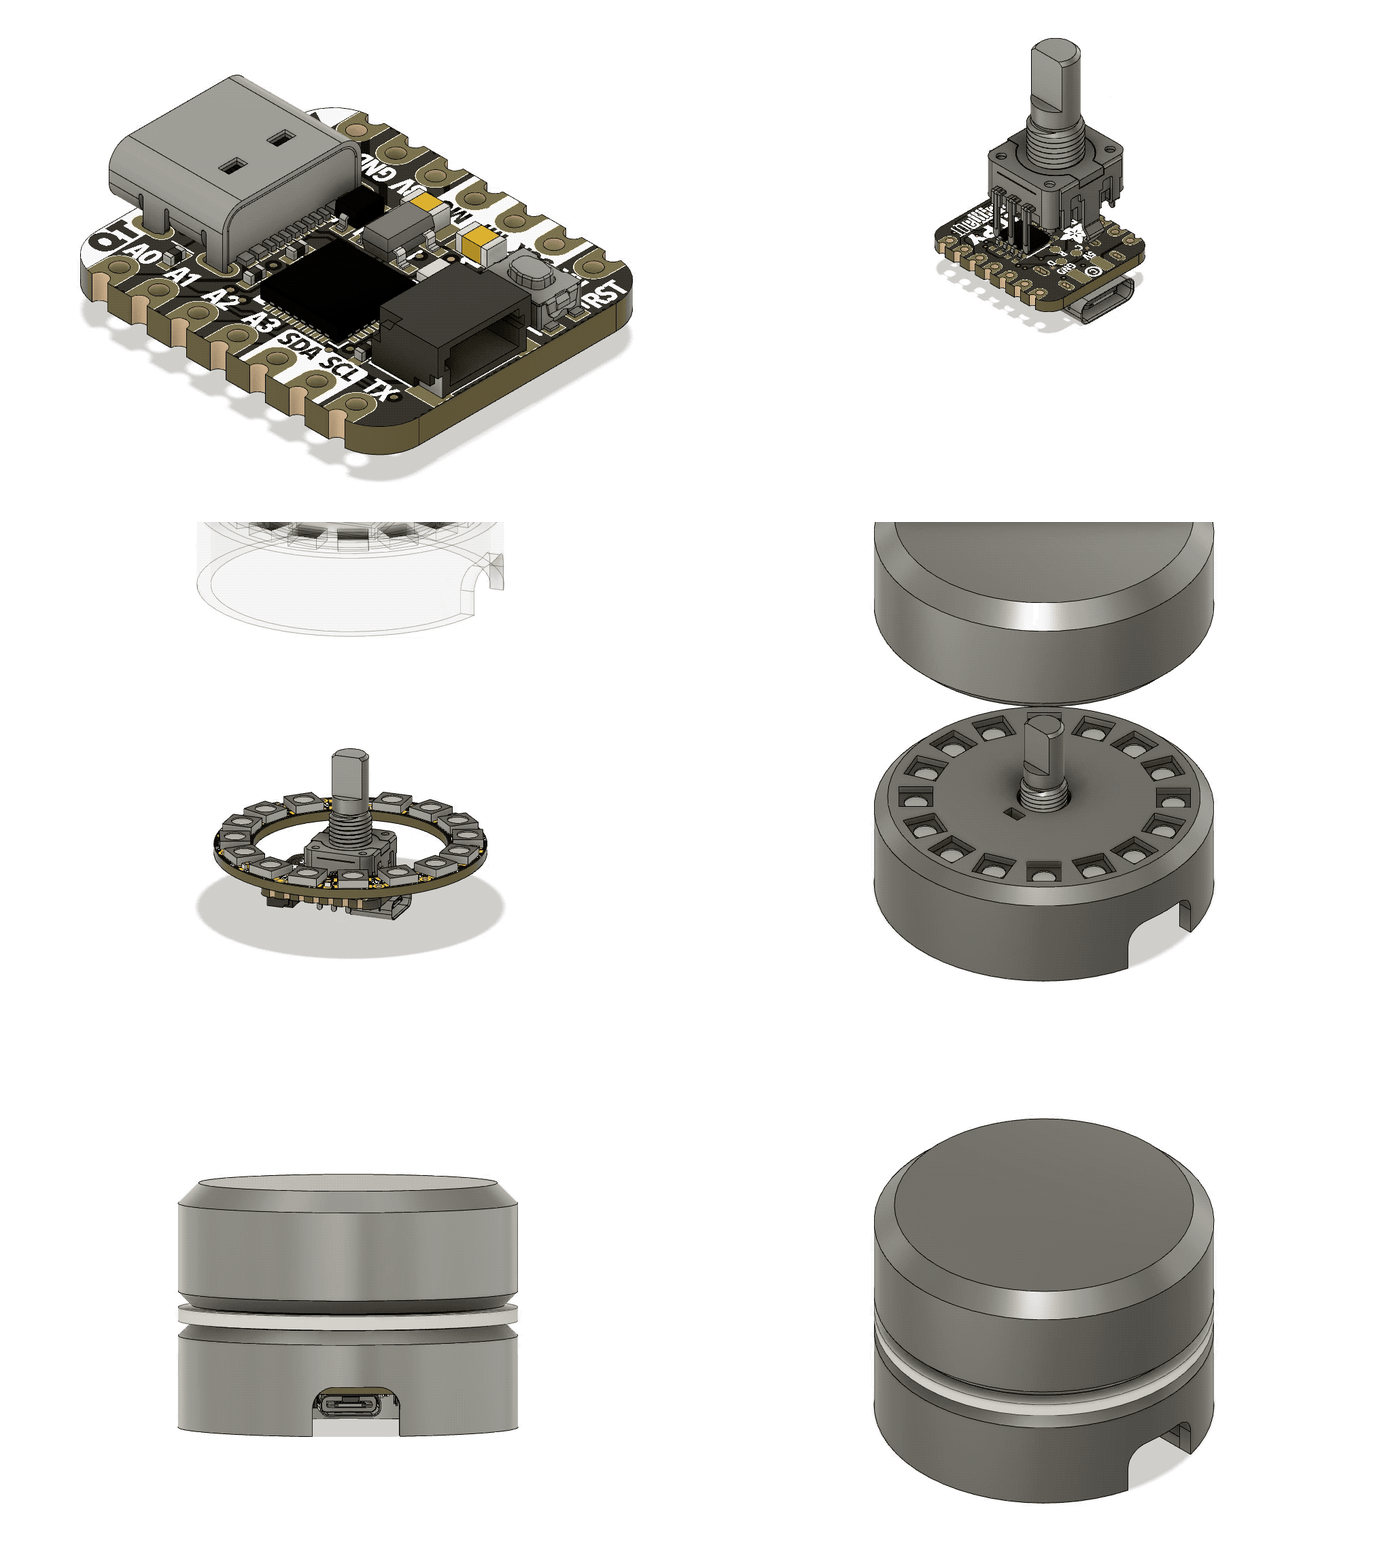
I really liked the Griffin PowerMate from over a decade ago, so I decided to design a 3d-printable enclosure that echos the design of the PowerMate, but that works with the restrictions of the QTPy+encoder stackup and a Neopixel ring. The result is pretty good I think.
All design files are in the qtpy-knob github repo.
The code is must easier now than the media-dial project I started cribbing from. This is due to the fact that CircuitPython now has native support for rotary encoders and this knob is trying to do much less than media-dial project.
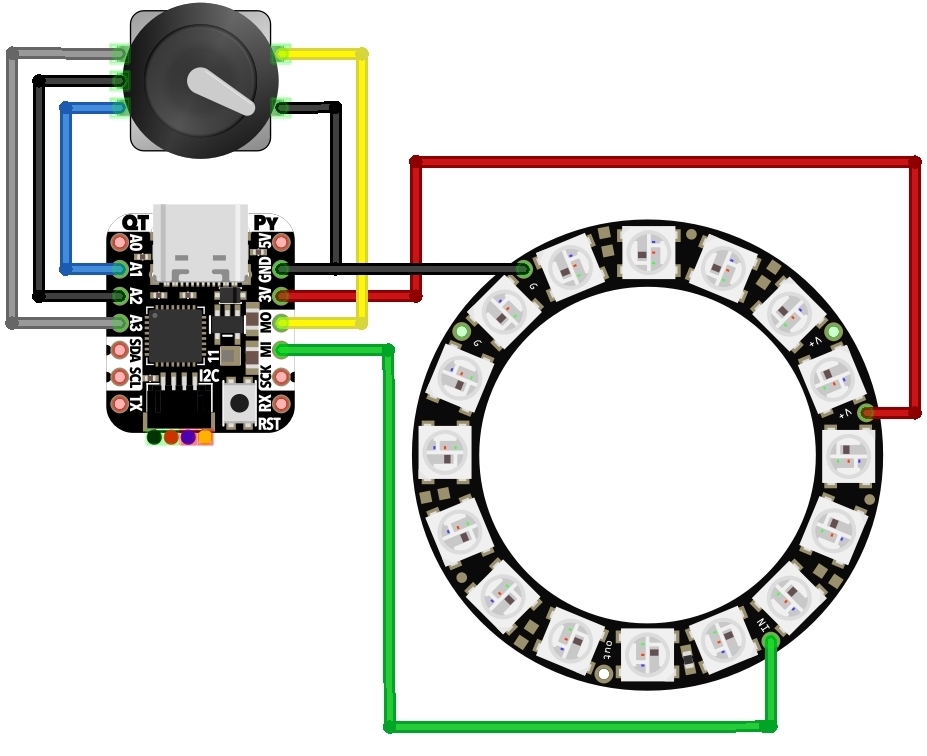
The electrical wiring is virtually non-existent, only needing three wires if you elect to add a Neopixel ring.

The assembly is described in the video above a bit, but you can also see what’s up in this CAD animation (thanks to the Adafruit_CAD_Parts repo for making the enclosure design easier)

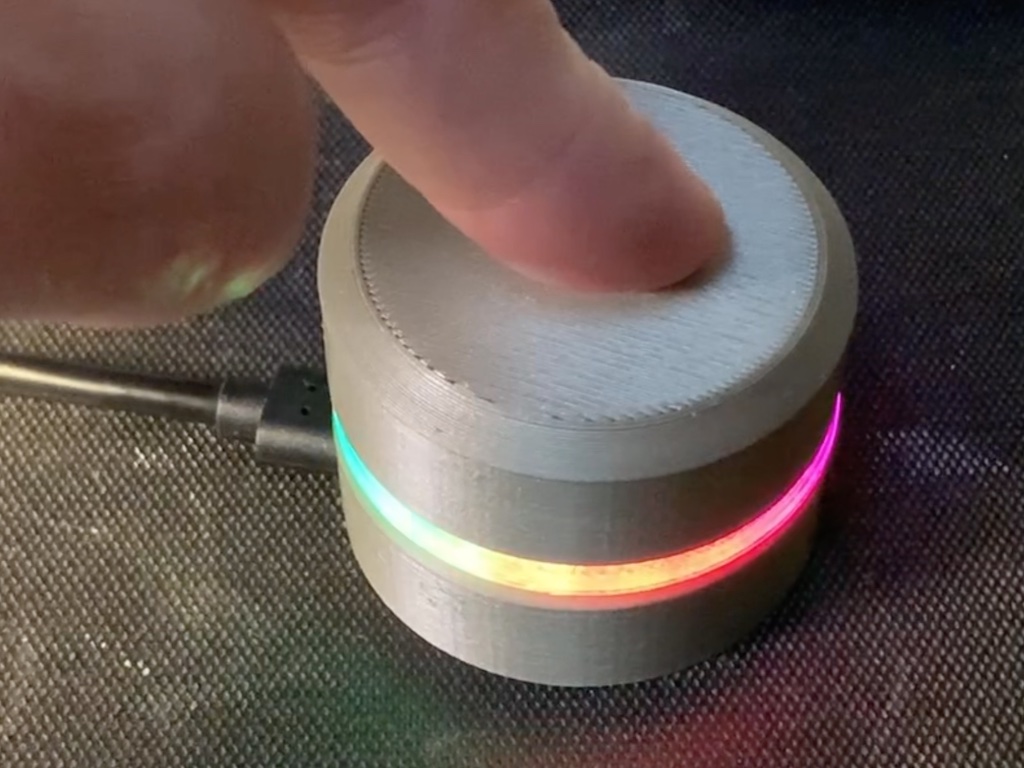
The result with opaque plastic and clear LED diffuser ends up looking pretty cool.


Hi Gordie!
From looking at the CircuitPython source for IncrementalEncoder, it looks like on SAMD21 (as used in the QT Py) it’s just using the pin-change interrupts, so you can use any two pins.
Do you know whether the rotaryio.IncrementalEncoder library use the hardware quadrature counter in the processor, or does it use interrupts?