Setting up a Bluetooth serial adapter like the SparkFun BlueSMiRF isn’t very hard, but not very intuitive.
Bluetooth supports many “profiles” for doing various things (phone headset, address book syncing, file exchange, etc.) One of these profiles is the “COM” profile and is a simple serial port: raw binary data transmit and receive. That’s the profile these Bluetooth serial adapters speak. All Bluetooth stacks on computers appear to support the COM profile.
The SparkFun BlueSMiRF module speaks only the COM profile and when powered on and set up, looks just like a normal serial port to software. In truth it looks a little like a modem, because you can escape into a “command mode” that has an AT-compatible configuration language.
The full steps are below.
Step 0: Plug in / power up your BlueSMiRF Bluetooth-to-serial adapter
This is application-specific, but do whatever you need to do to get the Bluetooth adapter hooked up to your gizmo you want to wirelessly control and give it power. For the Roomba, I’ve created a few Bluetooth interfaces.
Step 1: Turn on Bluetooth and start Bluetooh Setup Assistant
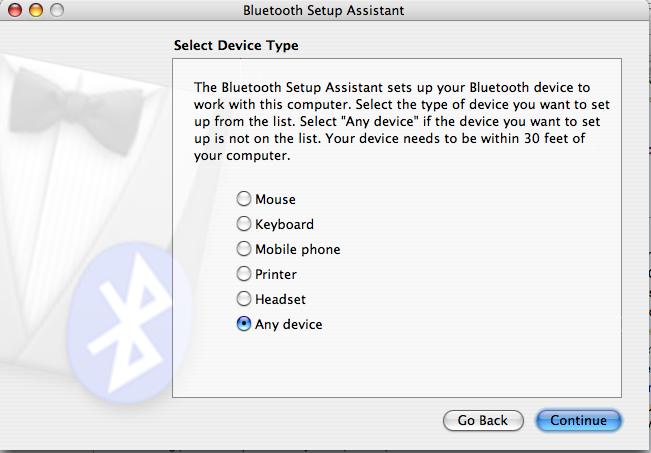
Open Bluetooh Preferences, turn Bluetooth on the “Settings” tab, then select the “Devices” tab and click the “Set Up a New Device” button. For type of device, choose “Any Device”. Click “Continue” to begin scanning for the Bluetooth serial adapter.
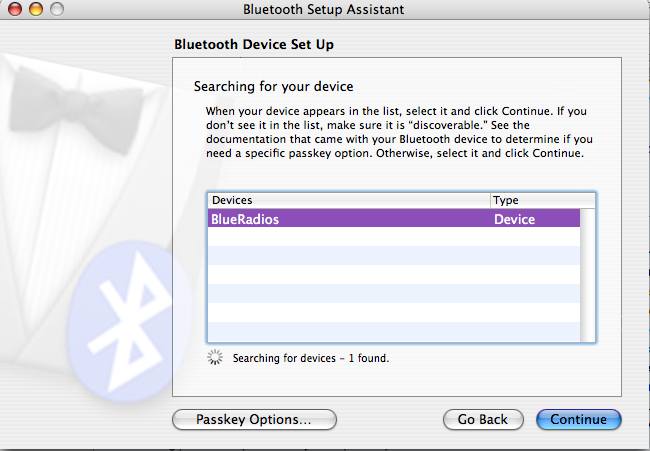
Step 2: Device found
The device should be found within a few seconds. At first you’ll see its Bluetooth address and then that will change to be the name of the adapter. This name is not unique and all BlueSMiRF modules will probably have the same name. (all three of mine had “BlueRadios”)
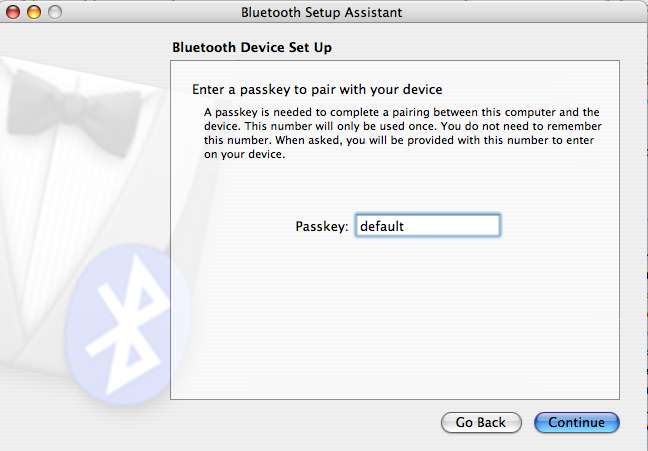
Step 3: Pair with adapter
Bluetooth devices usually exchange a secret key called a PIN. By default, the BlueSMiRF’s PIN is the string “default”. So tell the Mac that and continue. (You can change the PIN later if you want by using the BlueSMiRF’s “AT” commands)
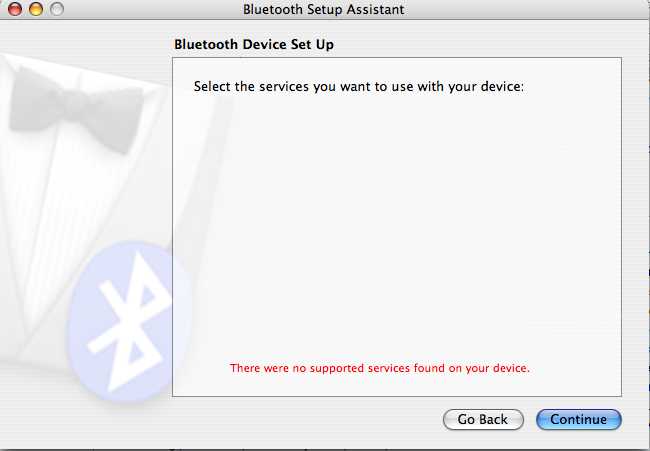
Step 4: Look at Bluetooth Setup Assistant be confused
If the pairing was successful, you’ll get the above screen. Don’t worry, everything is fine. Bluetooth serial adapters are rare enough that the wizard doesn’t have a case for what to display. Just click “Continue”.
Step 5: Observe your handiwork
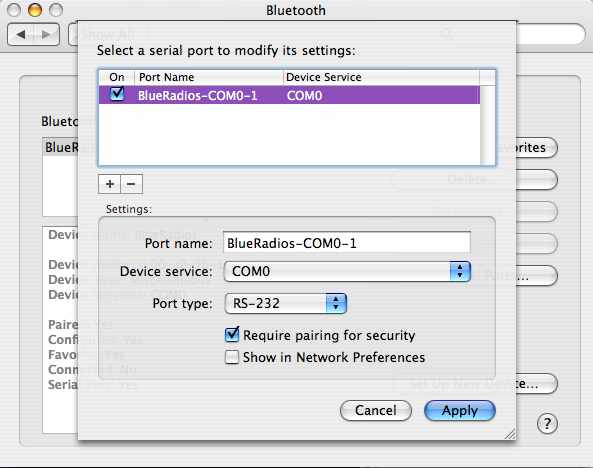
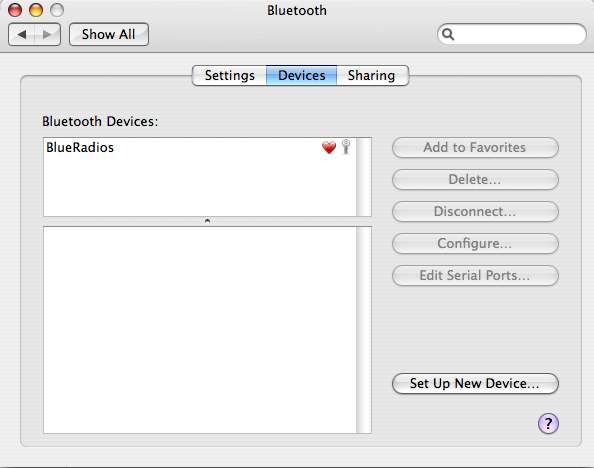
You should now have a “BlueRadios” device in your device list. Select it and click “Edit Serial Ports…”.
Step 6: Configuring Serial Ports
As you can see, the serial port is already set up for you the way it should be. The only thing to add is to tick “Require pairing for security” since I think the BlueSMiRF modules may require it. [note: test this again]
Now you have a working Bluetooth serial port. You can access it with any program that speaks to serial ports. One of the best GUI programs to do this is ZTerm.
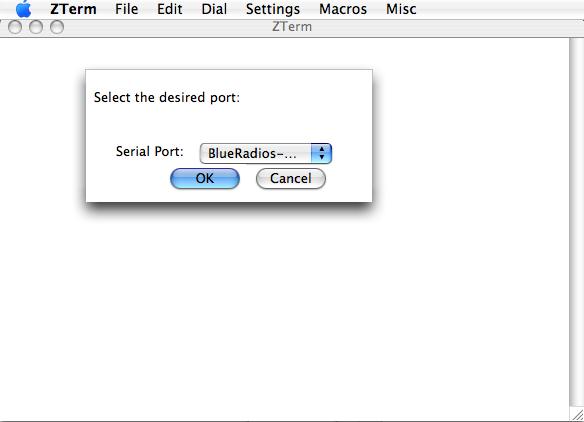
Step 7: Launch ZTerm and Pick your Port
When launching ZTerm, hold down the Shift key so you can select a port. Select the port you saw in the previous step. It should be “BlueRadios-COM0-1”.
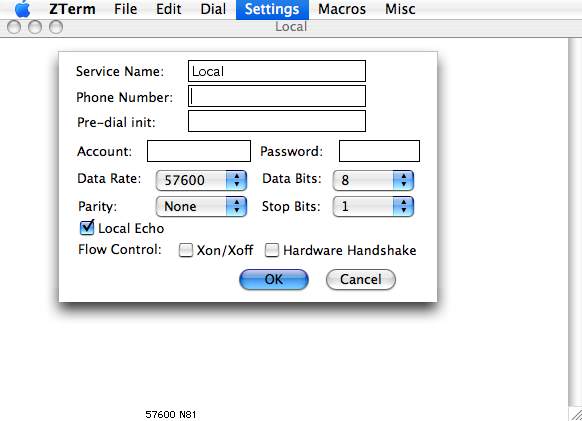
Step 8: Configure ZTerm
Set up ZTerm like above. 57600 bps, 8N1 is a good speed (and the speed the Roomba talks at, if you’re doing Roomba stuff). The “Local Echo” is so you can see what you type for the steps below, because the BlueSMiRF doesn’t echo back.
The actual speed you set here doesn’t change the physical speed at the RX/TX wires of the BlueSMiRF. For that we need to go into command mode and change some of BlueSMiRF’s parameters.
Step 9: Configure BlueSMiRF
The BlueSMiRF should power up in “data mode”, that is, it’s like a virtual cable with nothing in between. You can command it however to change how it behaves.
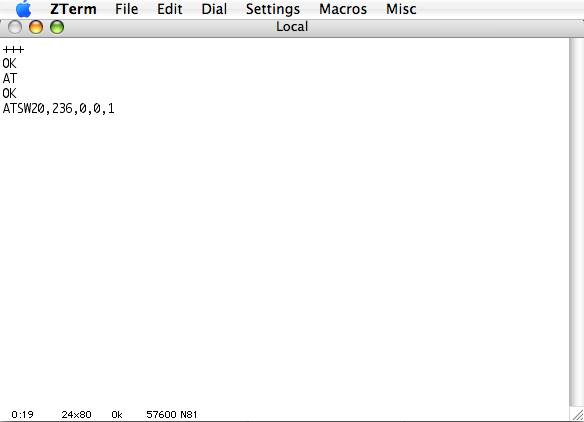
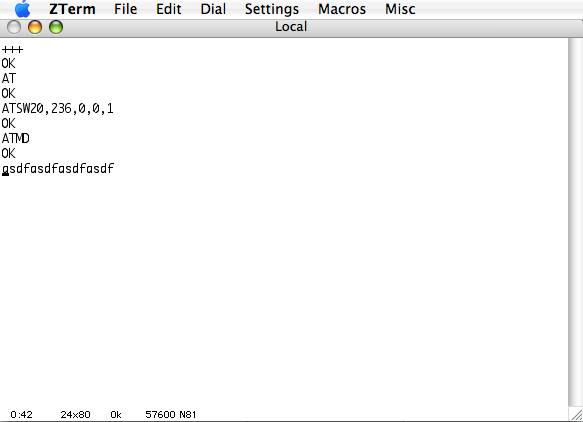
Just like an old AT-compatible mode, you enter command mode with “+++” and pressing Return. It should respond with “OK”. To verify, type “AT” and Return again, and it should again respond with “OK”. Now type “ATSW20,236,0,0,1”. This magic incantation changes the speed and other serial paraemters of the other ‘side’ of the BlueSMiRF (i.e. the RX/TX lines plugged into whatever, like a Roomba) to 57600 8N1. This needs to be done because by default, it comes up at something like 19200 bps.
If you’d like the details on how to switch to other speeds and all the other magic parameters, either contact SparkFun or BlueRadios (the makers of BlueSMiRF’s heart)
Step 10: Finishing up
Put the BlueSMiRF back in data mode with “ATMD” and then you’re done. It should come back up in data mode automatically on powerup. If you find it’s not coming up in data mode, enter the magic configuration incantation “ATSW25,0,1,0,0“, wait for the “OK” response and try again.
If you’re unix-saavy, you can see the serial ports along with all the others by doing an “ls /dev/cu.*” in the Terminal. And if you know how to write code to speak to serial ports, just use /dev/cu.BlueRadsio-COM0-1 as the serial port.


anyone know the default PIN for the Banggood bluetooth serial adapter?